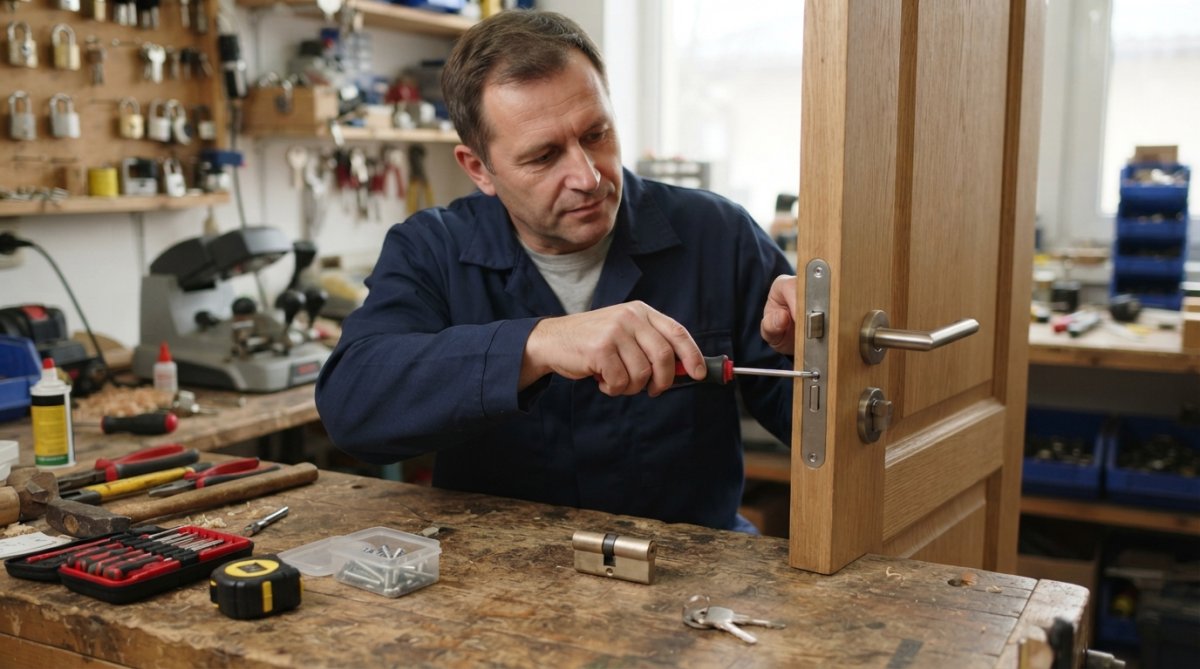
 how-to
How to Change a Euro Cylinder: Step-by-Step Guide
Table of Contents
- What You'll Need Before You Start
- Tools Needed to Change a Euro Cylinder
- How to Measure a Euro Cylinder Correctly
- Step 1: Removing the Old Euro Cylinder
- Step 2: Fitting the New Cylinder and Checking Alignment
- Choosing the Right Security Rating: Anti-Snap and Beyond
- Key-Alike vs Keyed-to-Differ: Which Suits Your Home?
- How Long Does It Take to Change a Door Lock?
- Troubleshooting Common Problems
- When to Call a Professional Locksmith
- Frequently Asked Questions
Last Updated: September 16, 2026
What You'll Need Before You Start
To change euro cylinder hardware is one of the few door security jobs a confident DIYer can complete in under half an hour, provided the new cylinder matches the old one exactly. A euro cylinder is the barrel-shaped lock that sits inside a uPVC, composite or timber door and operates the multi-point locking system through a central cam. This guide from N&G Locksmiths Service Ltd walks through every stage: measuring, removing, fitting and testing.
Get the preparation wrong and you will be making a second trip to the merchant or, worse, leaving a door that will not lock. Before touching a screwdriver, confirm three things:
- The new cylinder is the correct overall length in millimetres
- The cam type matches your existing lock mechanism
- You have the right security rating for the door's location
Tools Needed to Change a Euro Cylinder
The tools needed to change a euro cylinder are minimal: a Phillips or Pozidriv screwdriver, a tape measure, and the new cylinder with its keys. Most uPVC and composite doors use a single fixing screw that holds the cylinder in place, so no specialist equipment is required for a standard swap.
A typical toolkit for the job includes:
- A medium Phillips or Pozidriv screwdriver
- A tape measure marked in millimetres
- The replacement cylinder, supplied with at least three keys
- A cloth and light lubricant for the mechanism
- A torch if the door edge is in shadow
If your door has an escutcheon or backplate covering the cylinder, you may also need a small flathead screwdriver to prise it free. Keep every screw you remove in a pot; door hardware screws are easily lost on a driveway.
How to Measure a Euro Cylinder Correctly
To measure a euro cylinder, take three figures in millimetres: the distance from the centre of the fixing screw hole to the external face, the same distance to the internal face, and the total. The fixing screw hole is the reference point for every measurement, and it sits at the centre of the cylinder body.
Measuring the External and Internal Sides
Place the cylinder on a flat surface with the cam facing you. Measure from the centre of the screw hole to the outer edge on the external side first. Record that figure. Then measure from the same centre point to the edge on the internal side. The two numbers together give the overall length.
For example, a cylinder measuring 35mm externally and 35mm internally is ordered as a 35/35. A door with a thicker external face might need a 45/35. The order always reads external first, internal second.
Why Millimetres Matter and What Happens If You Get It Wrong
Millimetres decide whether the cylinder sits flush or protrudes. A cylinder that is even 5mm too long on the external side leaves a lip that snap attacks exploit, while one that is too short will not engage the cam properly and the door will not lock.
If you are unsure of the measurement, remove the old cylinder first and measure it directly rather than measuring the door. The old barrel is the most reliable template you have.
Step 1: Removing the Old Euro Cylinder
Removing the old euro cylinder takes about five minutes once the door is open. Open the door so you can access the edge, then locate the single fixing screw that runs horizontally into the cylinder from the door's edge face.
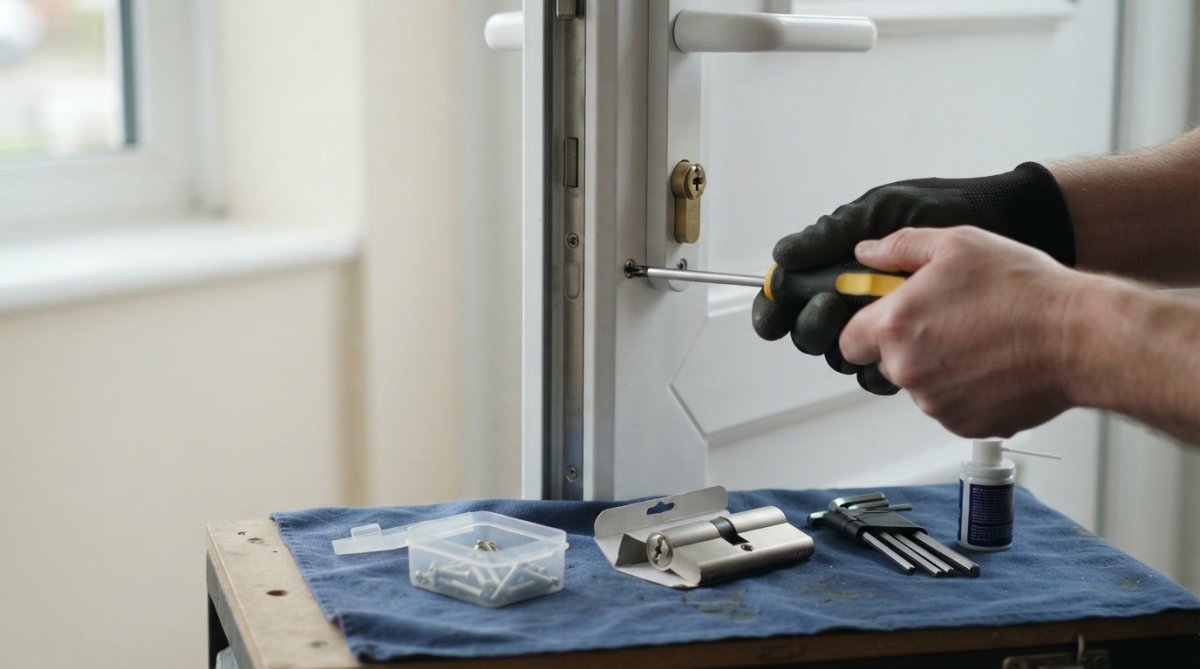
Locating the Fixing Screw
The fixing screw sits on the door edge, level with the handle and often hidden behind a small cover plate or cap. On some doors it is visible immediately; on others you will need to look along the edge for a recessed screw head.
Once removed, the cylinder should slide out with the key inserted and turned slightly. If it resists, turn the key to align the cam with the housing and try again.
Step 2: Fitting the New Cylinder and Checking Alignment
Fitting the new cylinder is the reverse of removal, but alignment is where most DIY jobs go wrong. Insert the key, turn it slightly so the cam sits flush, and slide the barrel into the door until the screw hole lines up with the hole in the door edge.
Refit the fixing screw and tighten it until it is snug, not forced. Then test the door with the key from both sides:
- The key should turn smoothly through a full rotation
- The multi-point lock should engage without resistance
- The cylinder should sit flush with both door faces
If the key binds or the cam catches, the cylinder is misaligned. Loosen the screw, reseat the barrel and try again before assuming the cylinder is faulty.
Choosing the Right Security Rating: Anti-Snap and Beyond
Anti-snap cylinders are the minimum standard worth fitting on any external door. A snap attack breaks the cylinder at its weakest point, and anti-snap designs incorporate a sacrificial section that snaps away while leaving the locking mechanism intact and operable. But "anti-snap" on its own is a marketing word, not a rating. The ratings are what tell you whether a cylinder has actually been tested.
What the TS 007 Star Ratings Actually Mean
TS 007 is the technical specification used to grade the security of replacement cylinders and the hardware around them. It works on a star system, and the stars are cumulative across the cylinder and the furniture:
- 1-star cylinder, passes a basic attack test but is not snap-resistant on its own. It must be paired with 2-star security furniture (a handle or escutcheon) to reach a 3-star equivalent.
- 2-star furniture, the handle or backplate carries the snap resistance. Used with a 1-star cylinder, the pair is treated as 3-star equivalent.
- 3-star cylinder, carries the full rating in the barrel itself, so it does not rely on the handle for protection. This is the simplest route on a front or back door.
A 3-star cylinder is usually the better buy for a main entrance: one component to fit, one component to replace if it is ever attacked, and no dependency on whether the existing handle happens to be rated. The 1-star plus 2-star furniture route makes sense when you are keeping an existing handle you like and only swapping the barrel.
Sold Secure and the Other Marks Worth Checking
Sold Secure is an independent testing scheme that grades products as Bronze, Silver or Gold depending on how long they resist a defined attack. For a euro cylinder, a Sold Secure rating is a useful cross-check alongside the TS 007 stars, because it confirms the product was tested by a third party rather than self-declared by the manufacturer.
When you are comparing cylinders, look for these features on the packaging or the product listing:
- Anti-snap, a sacrificial break point in the barrel
- Anti-pick, resistance to manipulation of the pins
- Anti-drill, hardened pins or plates that blunt drill bits
- Anti-bump, protection against bump keys, which exploit a worn or low-tolerance pin stack
- Anti-extraction, resistance to the cylinder being pulled out of the door
A cylinder that claims all five without a TS 007 star or a Sold Secure grade is worth treating with suspicion. The marks exist precisely because the words alone are easy to print on a box.
Matching the Rating to the Door
Not every door needs the same specification. A reasonable approach:
- Front and back entrance doors, 3-star cylinder, or 1-star plus 2-star furniture if you are keeping the handle.
- Internal doors and cupboards, a standard cylinder is fine; the threat model is different.
- French doors and patio doors, check that the cylinder length and cam suit the multipoint gearbox before buying, because these mechanisms are less forgiving of a mismatched barrel.
How to Verify Before You Buy
Check the packaging for the TS 007 star marking and, where present, the Sold Secure grade. Reputable merchants will list both. If you are buying online and neither is stated, ask the supplier directly, a genuine 3-star cylinder will have documentation to back the claim. Keep the receipt and the product code; if you ever need to make an insurance claim after a break-in, being able to show the specification of the cylinder that was fitted is useful evidence.
For a front or back door, 3-star is the simpler and often cheaper route to full protection. For a property with several external doors, buying the same rated cylinder across all of them keeps the security level consistent and makes key-alike ordering straightforward.
Key-Alike vs Keyed-to-Differ: Which Suits Your Home?
Key-alike cylinders let one key open every door in the property, while keyed-to-differ cylinders each require their own key. Key-alike is the practical choice for most homes: one key for the front door, back door, side gate and any outbuildings, with no fumbling on a dark doorstep.
Keyed-to-differ suits landlords and shared buildings. If a tenant loses a key, only that one cylinder needs replacing, and no other door is compromised. It also limits the damage if a key is copied without permission.
For a family home with multiple external doors, key-alike is almost always the better answer. Ask the supplier to match the cylinders to a single keyway before ordering, because retrofitting alignment later is not possible.
How Long Does It Take to Change a Door Lock?
To change euro cylinder hardware typically takes 15 to 30 minutes per door for a straightforward swap where the replacement matches the old barrel. The job runs longer if the door has a covered escutcheon, if the old cylinder is seized, or if the new cylinder needs adjusting for alignment.
A realistic breakdown looks like this:
| Stage | Typical Time |
|---|---|
| Measuring and confirming the size | 5 minutes |
| Removing the old cylinder | 5 minutes |
| Fitting and aligning the new cylinder | 10 minutes |
| Testing the lock from both sides | 5 minutes |
A locksmith working across several doors will usually complete each one faster because the measuring and alignment steps become routine.
Troubleshooting Common Problems
Most problems after a cylinder swap trace back to alignment, the cam position, or a screw that has been overtightened. Work through the likely causes before assuming the cylinder is defective. The table below maps the symptom to the most probable cause, then the sections that follow explain each fix.
| Symptom | Most likely cause | First thing to check |
|---|---|---|
| Key will not turn at all | Cam not aligned, or multipoint gearbox out of line | Cam position with the cylinder removed |
| Key turns with door open, binds when closed | Door has dropped; multipoint keeps misaligned | Hinge adjustment and keep alignment |
| Cylinder will not slide in | Wrong overall length, or cam not flat | Measurement against the old barrel |
| Cylinder slides in but screw will not start | Screw hole not lined up, or screw cross-threaded | Rotate barrel slightly and re-seat |
| Key turns but door will not lock | Multipoint mechanism not engaging | Handle lift and gearbox operation |
| Cylinder feels loose after fitting | Screw overtightened or stripped | Screw thread and door edge |
Stuck Cam and Jammed Barrel Issues
A stuck cam usually means the key was not turned to the correct position before the cylinder was inserted. Remove the cylinder, insert the key, and rotate it until the cam sits flat within the barrel profile, then refit. On most euro cylinders the cam needs to be roughly in line with the barrel body for the cylinder to pass through the door and engage the gearbox.
A jammed barrel that will not turn at all often points to a misaligned multi-point lock rather than the cylinder itself. Check that the door is sitting square in the frame; if the handle lifts with resistance, the lock mechanism is out of line and the cylinder is not the fault. In that case, adjusting the hinges or the keeps is the fix, not replacing the cylinder again.
When the Cylinder Will Not Slide In
If the new cylinder resists going in, stop and check three things before forcing it:
- Length, measure the new barrel against the old one. A cylinder that is even a few millimetres too long on either side will not seat flush.
- Cam position, the cam must be flat. Turn the key until it is.
- Debris in the cavity, if the old cylinder was snapped, fragments of the barrel or the screw can be lodged inside the door. A torch and a thin screwdriver will usually reveal them.
Forcing a cylinder in can damage the gearbox behind it, which turns a fifteen-minute job into a lock case replacement.
Snapped Barrel and Extraction Problems
If the old cylinder has been snapped, part of the barrel may still be inside the door, and the fixing screw may be sheared or seized. This is the one scenario where a DIY swap often turns into a locksmith call-out, because extracting a snapped cylinder without damaging the gearbox takes the right tools and a bit of patience. Do not drill blindly, the gearbox sits directly behind the cylinder, and a drill bit through it means a new lock case.
Overtightened Screw and Loose Cylinder
The fixing screw should be snug, not forced. Overtightening can strip the thread in the door edge or distort the cylinder body enough to bind the key. If the cylinder feels loose after fitting, check whether the screw has stripped its thread; if it has, a slightly longer screw of the same gauge will often bite into fresh material, but do not go so long that it protrudes into the cylinder cavity.
When the Door Will Not Lock After Fitting
A door that will not lock after a cylinder swap is usually a multipoint engagement problem rather than a cylinder problem. Lift the handle fully and check that the hooks and rollers extend; if they do not, the gearbox is not being driven. This can happen if the cam is not seated correctly in the gearbox slot, or if the door has dropped and the keeps no longer line up with the locking points. In the second case, the cylinder is fine and the door needs adjusting.
When to Call a Professional Locksmith
Call a professional locksmith when the cylinder is seized, when the door will not align after several attempts, or when the property needs a full security upgrade across multiple doors. A stuck cylinder that will not budge often needs drilling out, and doing that badly can damage the lock case behind it.
There are also situations where the job is not worth the risk:
- The door has dropped and needs hinge or frame adjustment
- The cylinder has been snapped and debris is lodged in the mechanism
- You need key-alike cylinders matched across several doors
- The property is a rental and the landlord needs documented compliance
At N&G Locksmiths Service Ltd, we handle cylinder replacements across residential and commercial properties with no call-out fee, a 30-minute response time and a 12-month guarantee on the work. Our certified professionals carry a range of anti-snap and 3-star cylinders, so the right barrel is often on the van.
A euro cylinder swap is a genuinely achievable DIY job, but only when the measurements are right and the security rating matches the door. Get either wrong and you have spent money on a cylinder that either will not fit or will not protect the property. If the measuring feels uncertain, or the door needs more than a straight swap, N&G Locksmiths Service Ltd can fit a correctly sized anti-snap cylinder, match keys across every external door and back the work with a 12-month guarantee. Call now to book a fit or a security assessment.
Frequently Asked Questions
Can you just change the cylinder of a lock?
Yes, in most cases you can replace just the euro cylinder without changing the entire lock mechanism. The cylinder sits inside the door and is held by a single fixing screw on the door edge. Once removed, a new barrel of the same size slots straight in. This is a common upgrade for security, and it takes around 15 to 30 minutes for a competent DIYer.
Can I change a lock barrel myself?
You can if you have basic tools and can measure accurately. The main challenge is getting the measurements right in millimetres, because a barrel that protrudes too far invites snap attacks. If your door has a thumb turn or the existing cylinder is stuck, a locksmith can handle it quickly and guarantee the fit.
What is the most important measurement when buying a new euro cylinder?
The critical measurement is the distance from the centre screw hole to each end of the cylinder, taken separately for the internal and external sides. These two figures, in millimetres, determine whether the new barrel sits flush with the door handle backplate. Getting this wrong means the cylinder either won't fit or will stick out, compromising security.
How much does a locksmith charge to change a euro cylinder?
Pricing varies depending on the cylinder's security rating, the door type, and the time of call-out. A standard replacement costs less than an anti-snap upgrade, and emergency call-outs outside normal hours may carry a premium. For an accurate figure, check the N&G Locksmiths Service Ltd pricing page or request a quote before booking.